Overview
This article provides step-by-step instructions to configure a Windows Server Update Services (WSUS) server to automatically download and approve updates. Proper WSUS configuration ensures your environment stays secure and up to date with minimal administrative effort.
Solution Steps
1. Configure Update Source
Open the WSUS Console.
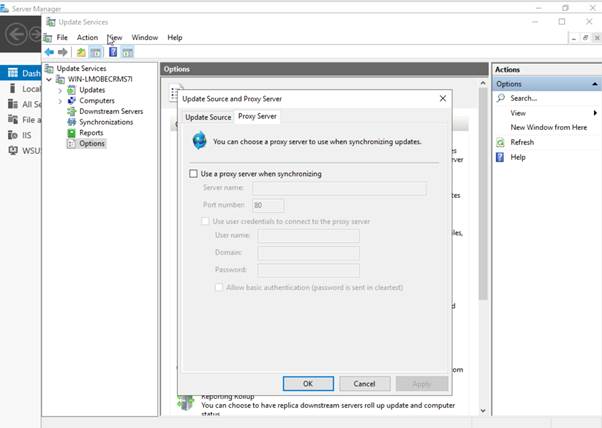
Navigate to Options → Update Source and Proxy Server.
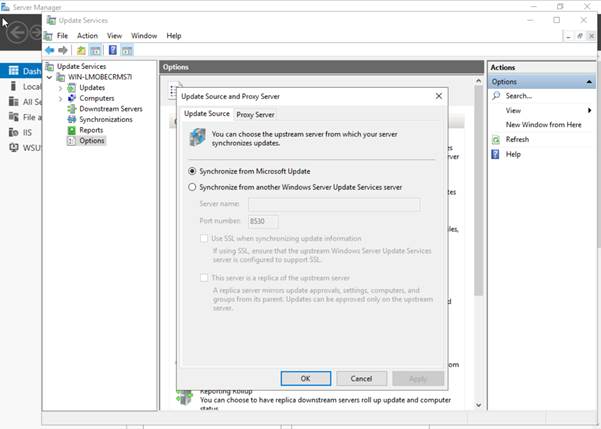
Under Update Source, select:
Synchronize from Microsoft Update.
If your environment requires internet access through a proxy, check Use a proxy server when synchronizing and enter the necessary proxy details and credentials.
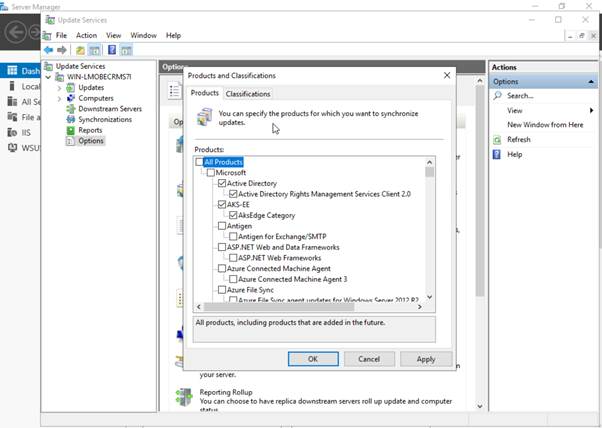
2. Configure Products and Classifications
Go to Options → Products and Classifications.
a. Products Tab
Choose All Products or select only the specific applications and operating systems relevant to your organization.
b. Classifications Tab
Select All Classifications, or only the required ones such as:
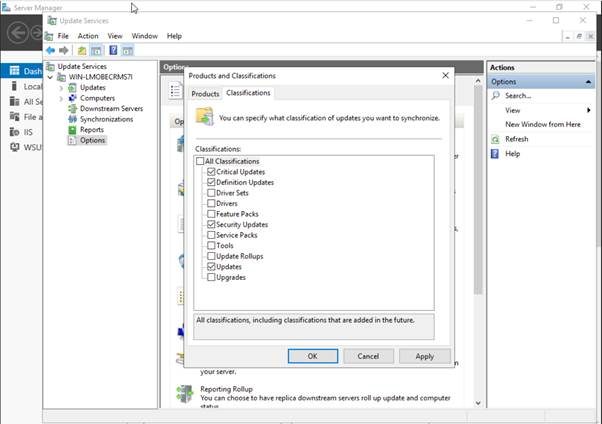
Critical Updates
Security Updates
Service Packs
Update Rollups
Updates
Upgrades
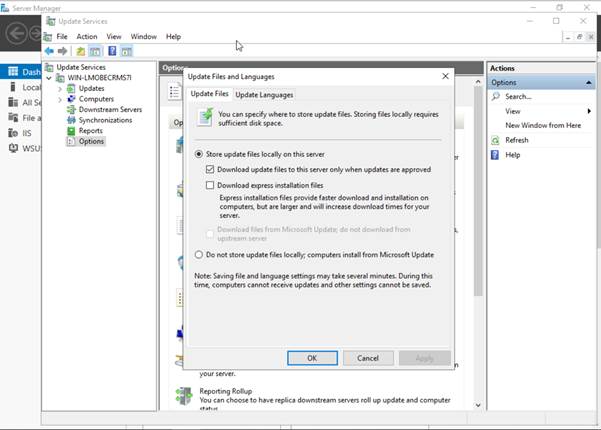
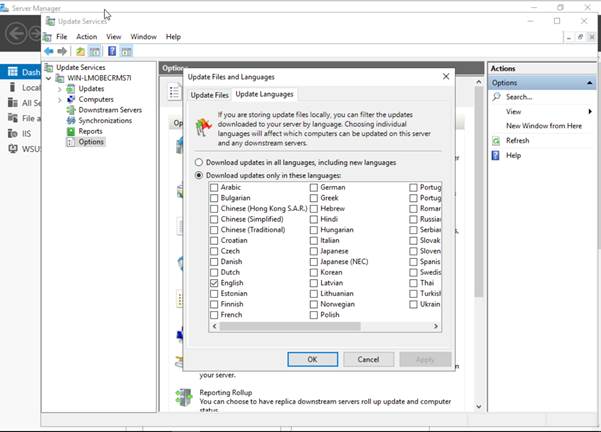
3. Configure Update Files and Languages
In Options, select Update Files and Languages.
a. Update Files Tab
Check Store update files locally on this server.
Check Download express installation files for faster client update installations.
b. Update Languages Tab
Select Download updates only in these languages, then choose the required languages for your organization.
4. Configure Synchronization Schedule
Navigate to Options → Synchronization Schedule.

Check Synchronize automatically.
Set a preferred synchronization time and choose the frequency (e.g., 3 times per day or as per organizational policy).
5. Configure Automatic Approvals
Go to Options → Automatic Approvals.
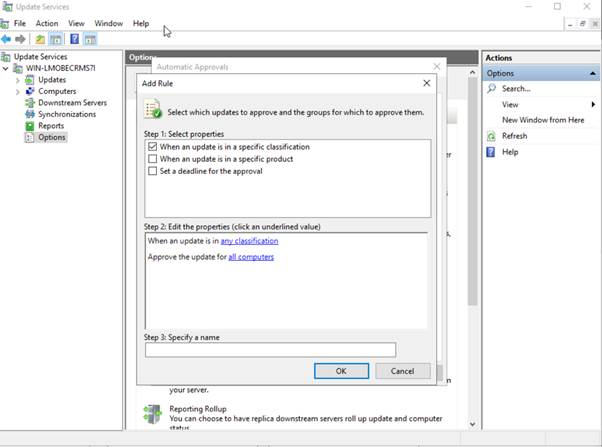
Click New Rule and configure as follows:
Under When an update is in a specific classification, select All Classifications (or those selected earlier).
Under When an update is in a specific product, select All Products (or those configured earlier).
Under Approve the update for, select All Computers, including Unassigned Computers.
Provide a Rule Name and click OK to save.
Under the Advanced tab, enable any additional options for granular control.

6. Configure Computer Assignment
Navigate to Options → Computers.
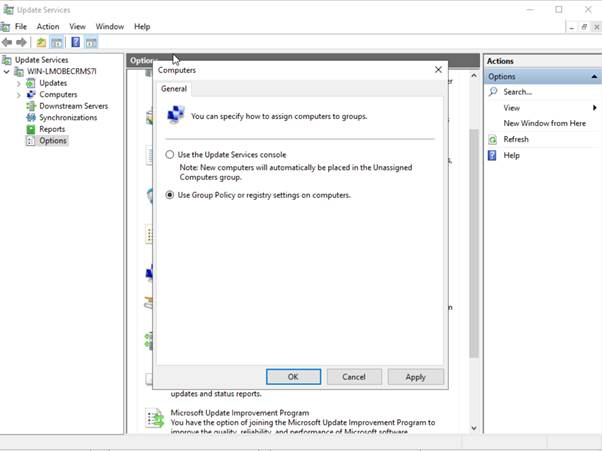
Choose Use Group Policy or Registry settings on computers to manage group membership and update approvals via Active Directory or registry settings.
7. Manual Maintenance Checklist
Monthly Maintenance:
Apply the latest security updates and service packs to the WSUS server.
Review and manually approve any updates that were not automatically approved.
Patch Schedule:
Microsoft releases updates on the second Tuesday of every month (“Patch Tuesday”).
Perform WSUS maintenance and verification during the second week of each month, preferably on Friday.
Emergency Patches:
Regularly monitor for emergency or out-of-band patches and apply them as required.
References
For detailed Microsoft documentation, refer to:
Conclusion
By following the above configuration steps, your WSUS server will automatically download and approve necessary updates, ensuring all managed systems remain secure, stable, and compliant with organizational update policies.
Was this article helpful?
That’s Great!
Thank you for your feedback
Sorry! We couldn't be helpful
Thank you for your feedback
Feedback sent
We appreciate your effort and will try to fix the article