Product Version: 6.5.0.0
Overview
Saner CVEM enables you to configure alerts to stay informed about key security and operational events across your organization. By selecting the relevant organization and associated account, you can set up alerts for specific modules, including:
Vulnerability Management
Patch Management
Asset Exposure
Compliance Management
Endpoint Management
Device Management
Posture Anomaly
Risk Prioritization
Setting up alerts ensures continuous monitoring, faster responses, and effective management of your organization’s overall security posture.
Part 1: Configure Mail Settings Before Enabling Alerts
Step 1: Access Control Panel
Click the Control Panel icon located at the top-right corner of the Saner CVEM console.
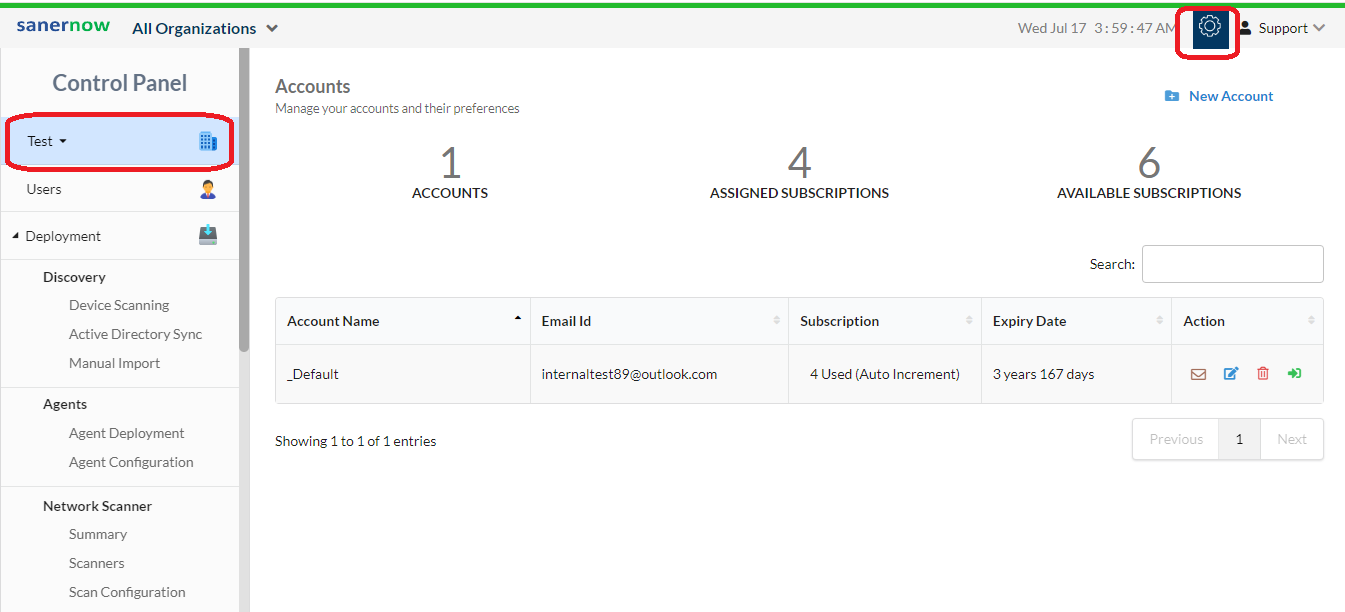
From the dropdown menu, select your organization.
Step 2: Navigate to Mail Settings
Under the Settings section, click Mail.
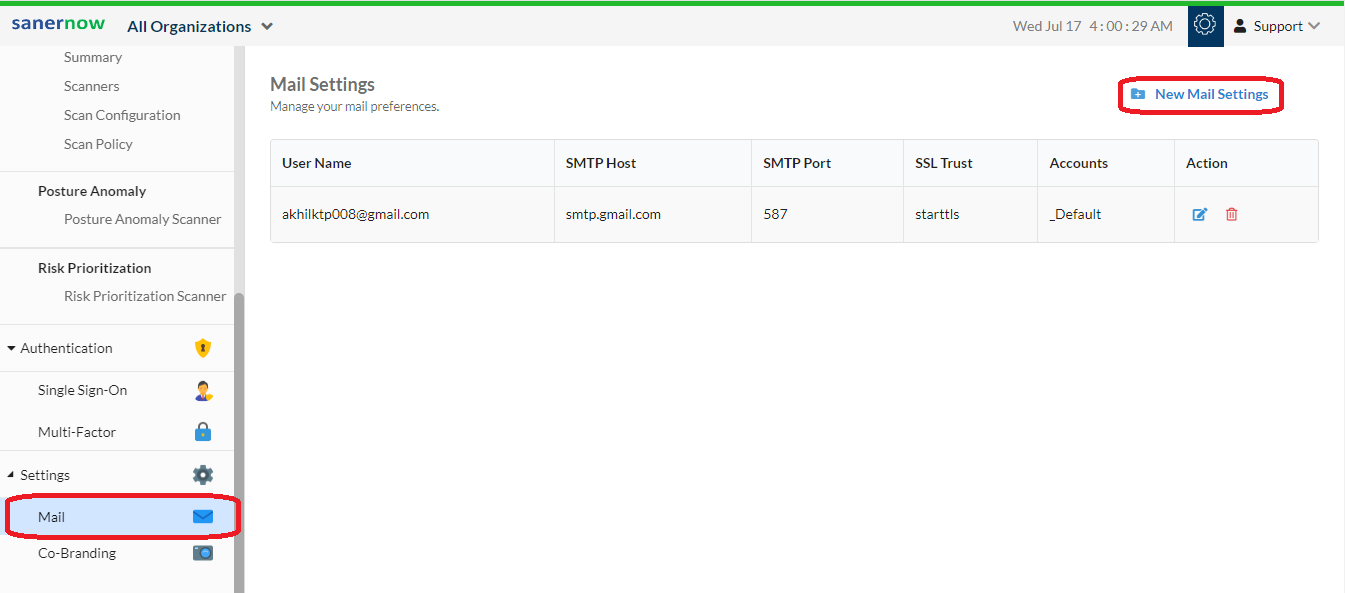
Select New Mail Settings to start configuration.
Step 3: Enter Mail Server Details
Refer to the mail server details based on your email provider: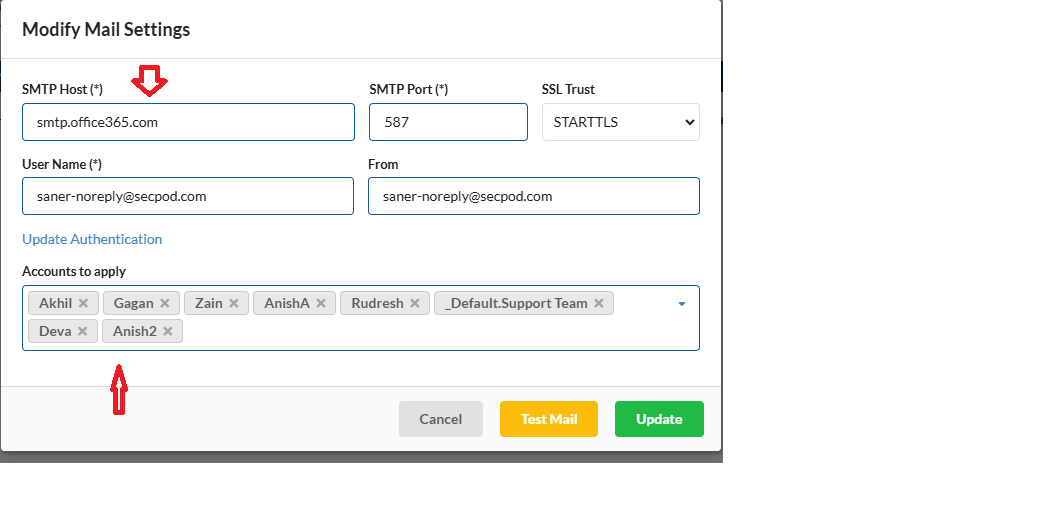
For Office 365 (OAuth Authentication):
SMTP Host:
smtp.office365.comSMTP Port:
587SSL Trust:
STARTTLSNote: Ensure the email address is whitelisted in your Office 365 admin portal to enable OAuth integration.
For Gmail (OAuth Authentication):
SMTP Host:
smtp.gmail.comSMTP Port:
587SSL Trust:
STARTTLS
Step 4: Test Mail Settings
Click Test Mail to validate the configuration.
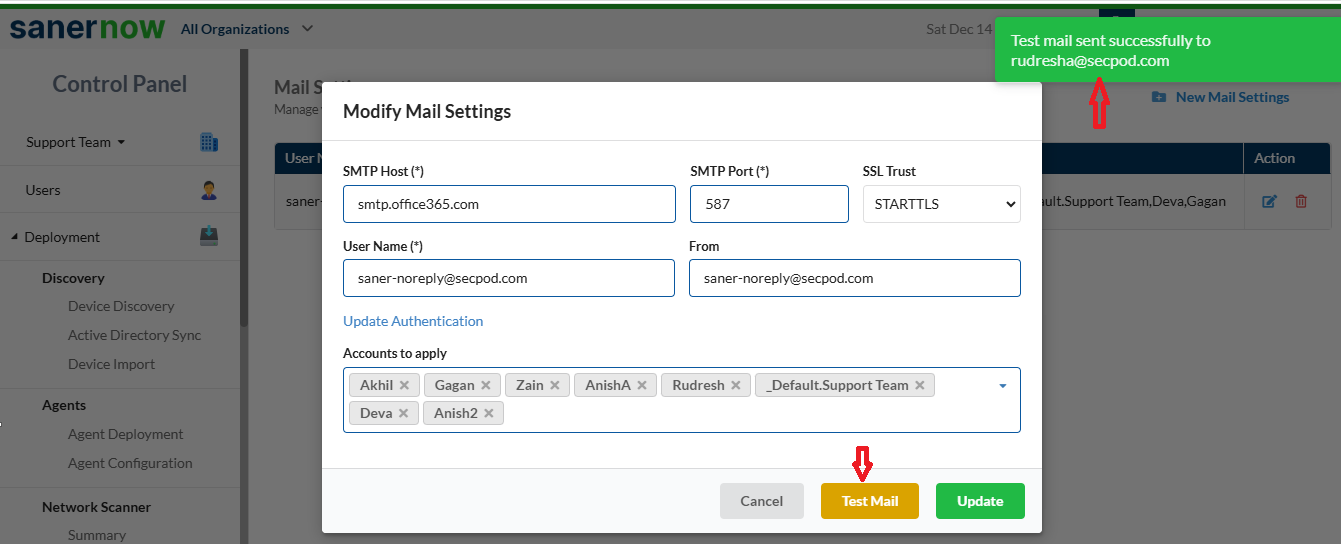
Upon successful testing, a confirmation notification will appear on the same page.
Step 5: Save Mail Settings
Click Create to save your configured mail settings.
Part 2: Configuring Alerts in Saner CVEM
Follow the steps below to configure alerts for different modules.
General Steps
Select your Organization Account.
Click Alerts from the left navigation panel.
Choose the module for which you have an active subscription and proceed with the module-specific configuration.
Module-Specific Alert Configuration
1. Asset Exposure
Enable Subscription Status.
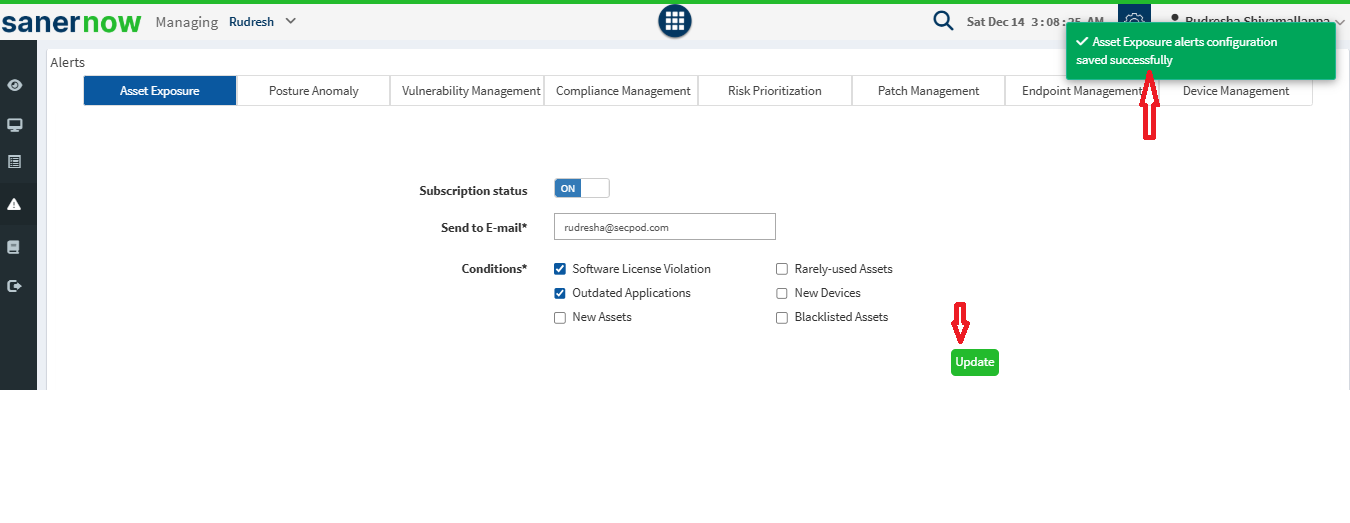
Assign the Send to E-mail field.
Select the Conditions for triggering alerts:
Software License Violation
Rarely Used Assets
Outdated Applications
New Devices
New Assets
Blacklisted Assets
Click Update to save the configuration.
2. Continuous Posture Anomaly Management
Repeat Steps 1 and 2 from Asset Exposure.
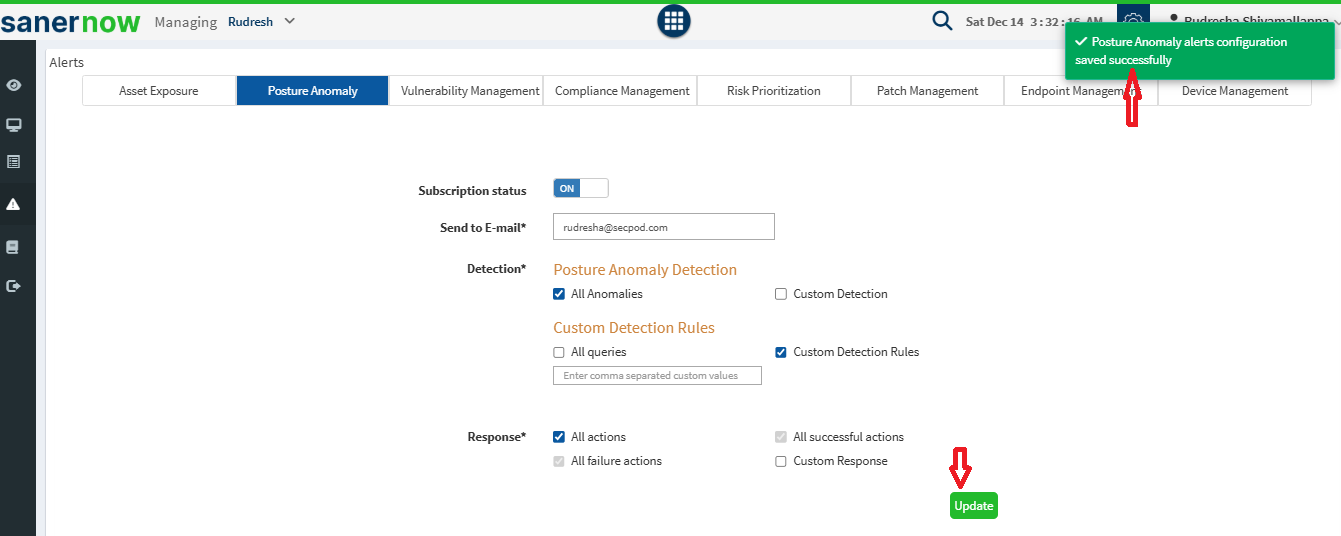
Configure anomaly detection options:
Enable All Anomalies Detection to receive alerts for all anomalies.
For custom alerts, enter PA-IDs under Custom Detects.
Under Custom Detection Rules, configure notifications for:
All queries or
Specific detection rules (comma-separated).
Specify Response Types:
All actions
All successful actions
All failure actions
Custom Response (comma-separated values)
Click Update to save changes.
3. Vulnerability Management
Repeat Steps 1 and 2 from Asset Exposure.
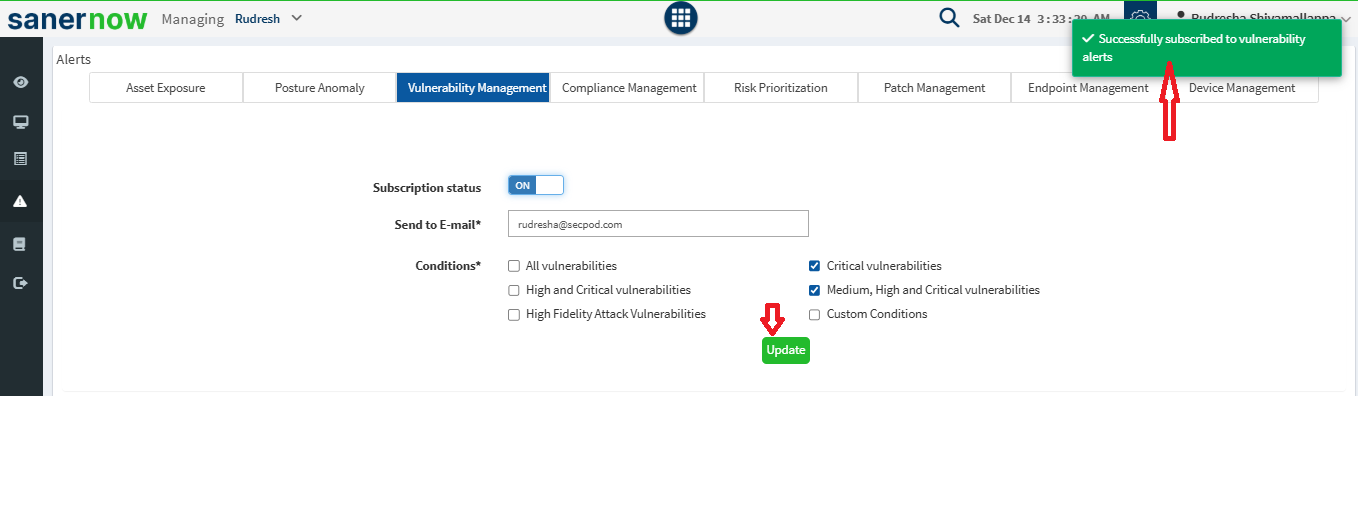
Define alert Conditions:
All vulnerabilities
Critical vulnerabilities
High and Critical vulnerabilities
Medium, High, and Critical vulnerabilities
High Fidelity Attack Vulnerabilities
Custom Conditions (CVE IDs comma-separated)
Click Update to save.
4. Compliance Management
Repeat Steps 1 and 2 from Asset Exposure.

Define alert Conditions:
All compliance checks
Custom Conditions (CCE IDs comma-separated)
Click Update to save changes.
5. Risk Prioritization
Repeat Steps 1 and 2 from Asset Exposure.
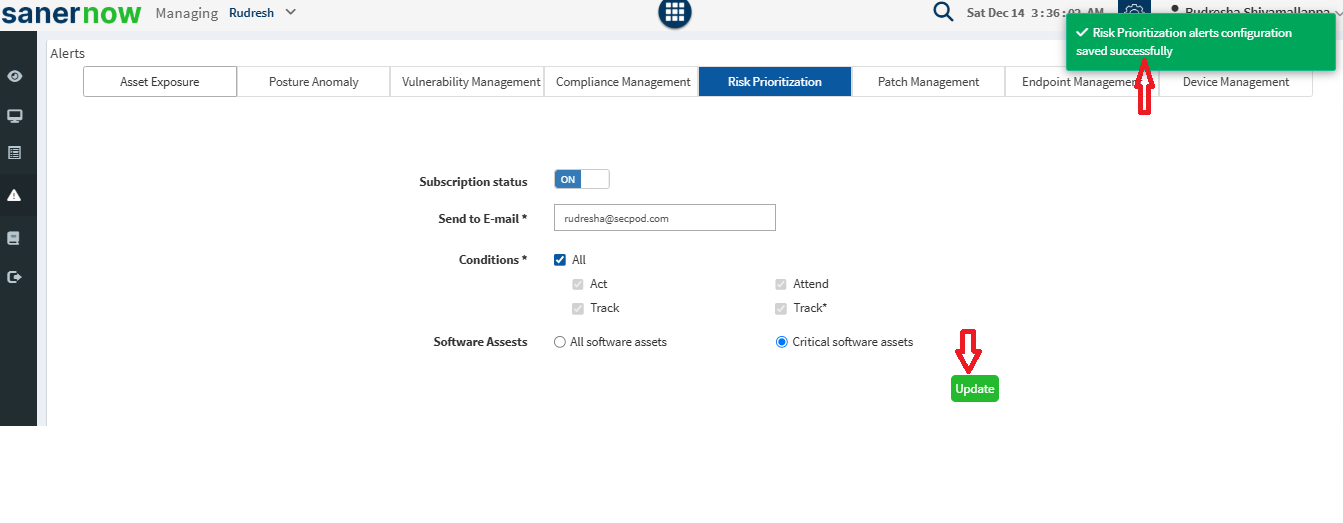
Enable the Detection checkbox to get notifications for:
All (Includes Act, Attent, Track, and Track*)
Under Software Assets, select the required types:
All Software Assets
Critical Software Assets
Click Update to save changes.
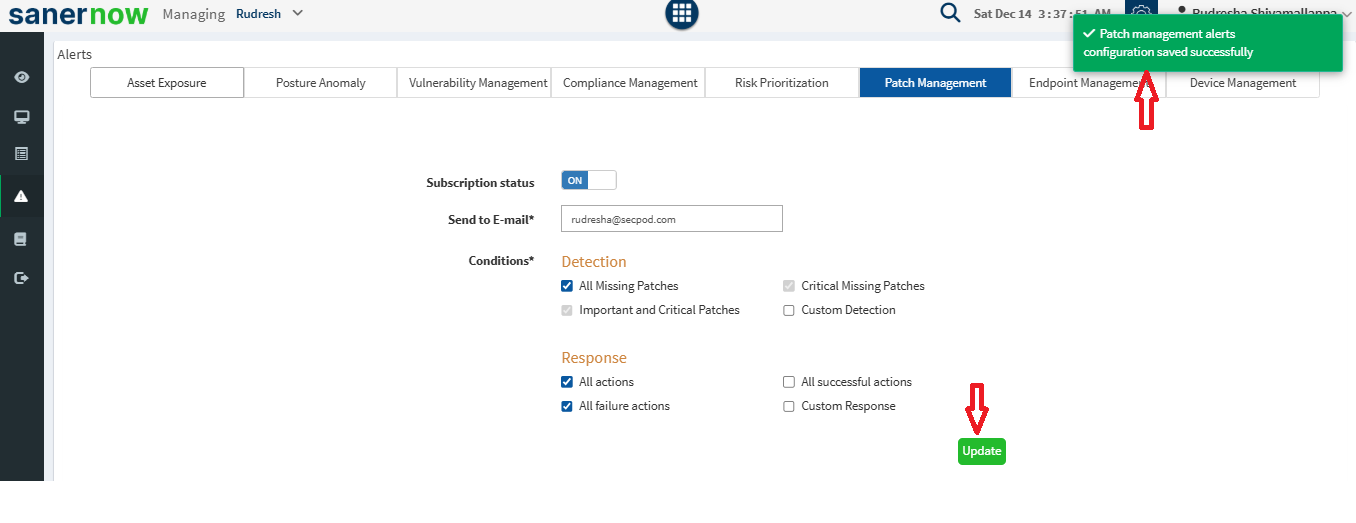
6. Patch Management
Repeat Steps 1 and 2 from Asset Exposure.

Enable the Detection checkbox to receive notifications for:
All Missing Patches
Critical Missing Patches
Important and Critical Patches
Custom Detection
Under Response, choose one of the following:
All queries
Specific detection rules (comma-separated)
Define Response Types:
All actions
All successful actions
All failure actions
Custom Response (comma-separated values)
Click Update to save the configuration.
7. Endpoint Management
Repeat Steps 1 and 2 from Asset Exposure.
Enable the Query Detection checkbox to receive notifications for:
All queries
Custom Query Detection (comma-separated)
Under Response, select:
All actions
All successful actions
All failure actions
Custom Response (comma-separated)
Click Update to save the settings.
8. Device Management
Repeat Steps 1 and 2 from Asset Exposure.
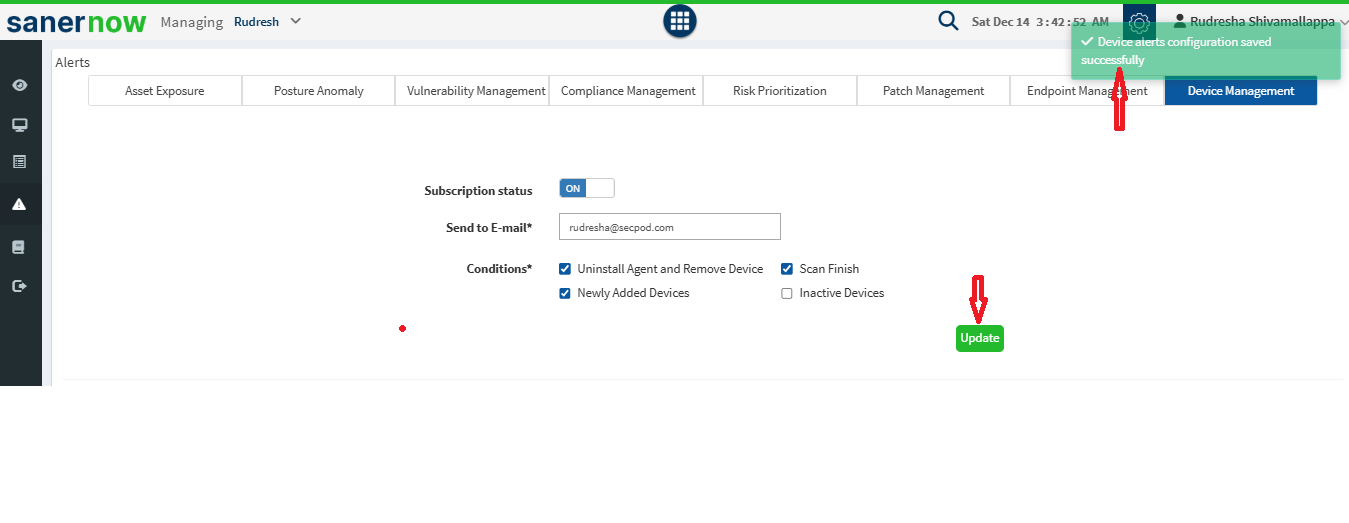
Define alert Conditions:
Uninstall Agent
Scan Finish
Newly Added Devices
Inactive Devices
Click Update to save changes.
Conclusion
By following these steps, you can configure and customize alerts in Saner CVEM to stay informed about critical events across your organization. This proactive monitoring enables quick responses to vulnerabilities, compliance deviations, anomalies, and other key actions, ensuring better visibility and control over your security environment.
Was this article helpful?
That’s Great!
Thank you for your feedback
Sorry! We couldn't be helpful
Thank you for your feedback
Feedback sent
We appreciate your effort and will try to fix the article